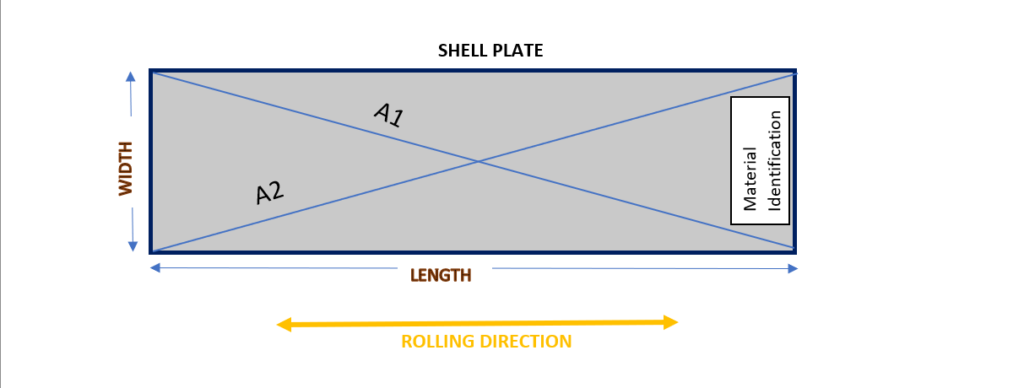
In the fabrication process of pressure vessel components, marking and cutting of shell plates require meticulous attention to detail. Here are essential points to ensure precision and quality:
• The plate is precisely cut to match the dimensions specified in the drawing.
• A bevel edge is meticulously prepared according to the drawing specifications.
• Cut edges are meticulously ground down to ensure they are sound, with a tolerance of 1 to 1.5 mm.
• Identification Markings are applied perpendicular to the rolling direction for clarity.
• Hard punching is avoided for ferrous plates thinner than 6mm and non-ferrous plates thinner than 12mm.
TOLERANCES:
1. Plate length and width: ± 1 mm per meter, with a maximum deviation of ± 3 mm.
2. A1-A2 measurement: ± 1 mm per meter, with a maximum deviation of ± 5 mm.